Introduction
This is a series about how to program for the Game Boy Advance (GBA) using the Rust programming language.
License
The work in this project is licensed as follows:
- Rust code:
Zlib OR Apache-2.0 OR MIT - All other content (linker scripts, book text, etc):
CC0-1.0
Support The Project
If you'd like to support the book you can sign up to be a Github Sponsor.
Basics
Let's program some stuff to run on the GBA.
Basic Compilation
As usual with any new Rust project we'll need a Cargo.toml file:
# Cargo.toml

[package]
name = "gba_from_scratch"
version = "0.1.0"
edition = "2021"
And we want some sort of program to run so let's make an example called ex1.rs in the examples/ directory.
It can just be a classic "Hello, World" type program to start.
// examples/ex1.rs

fn main() {
  println!("hello");
}
Since we're not running the compiler on the GBA itself, then we'll need to "cross-compile" our program. It's called "cross compilation" when you build a program for some system other than the system that you're running the compiler on. The system running the compiler is called the "host" system, and the system you're building for is called the "target" system. In our case, the host system can be basically anything that can run a Rust toolchain. I've had success on Windows, Linux, and Mac, there's no big difficulties.
To do a cross compile, we pass --target to cargo.
If we look up the Game Boy Advance on wikipedia, we can see that it has an ARM7TDMI CPU.
The "ARM7T" part means that it uses the "ARMv4T" CPU architecture.
Now we go the Platform Support page and use "ctrl+F" to look for "ARMv4T".
We can see three(-ish) entries that might(?) be what we want.
armv4t-none-eabiarmv4t-unknown-linux-gnueabithumbv4t-none-eabi
This is the part where my "teach like you're telling a story" style breaks down a bit.
What should happen next is that we pick the thumbv4t-none-eabi target.
Except there's not an easy to find document that tells you this step that I can just link to and have you read a few lines.
The shortest version of the full explanation is something like "Many ARM CPUs support two code 'states', and one of them is called 'thumb', and that's the better default on the GBA."
We can certainly talk more about that later, but for now you just gotta go with it.
Let's see what happens when we pass --target thumbv4t-none-eabi as part of a call to cargo:
>cargo build --example ex1 --target thumbv4t-none-eabi
   Compiling gba_from_scratch v0.1.0 (D:\dev\gba-from-scratch)
error[E0463]: can't find crate for `std`
  |
  = note: the `thumbv4t-none-eabi` target may not be installed
  = help: consider downloading the target with `rustup target add thumbv4t-none-eabi`
  = help: consider building the standard library from source with `cargo build -Zbuild-std`

error: requires `sized` lang_item

For more information about this error, try `rustc --explain E0463`.
error: could not compile `gba_from_scratch` (lib) due to 2 previous errors
Well we seem to have already configured something wrong, somehow. The trouble with a wrong project configuration is that the compiler can't always guess what you meant to do. This means that the error message suggestions might be helpful, but they also might lead you down the wrong path.
One suggested way to fix the problem is to add the thumbv4t-none-eabi target with rustup.
It seems pretty low risk to just try installing that, so let's see.
>rustup target add thumbv4t-none-eabi
error: toolchain 'nightly-x86_64-pc-windows-msvc' does not contain component 'rust-std' for target 'thumbv4t-none-eabi'; did you mean 'thumbv6m-none-eabi'?
note: not all platforms have the standard library pre-compiled: https://doc.rust-lang.org/nightly/rustc/platform-support.html
help: consider using `cargo build -Z build-std` instead
Ah, dang.
If we double check the Platform Support page we might see that thumbv4t-none-eabi is in the "Tier 3" section.
Tier 3 targets don't have a standard library available in rustup.
How about this build-std thing?
The -Z flags are all unstable flags, so we can check the unstable section of the cargo manual.
Looks like build-std lets us build our own standard library.
We're going to need Nightly rust, so set that up how you want if you need to.
You can use rustup default nightly (which sets the system global default), or you can use a toolchain file if you want to use Nightly on just this one project.
Once we've set for Nightly use, we need to get the rust-src component from rustup too.
rustup default nightly
rustup component add rust-src
Okay let's try again
> cargo build --example ex1 --target thumbv4t-none-eabi -Z build-std
   Compiling compiler_builtins v0.1.89
   Compiling core v0.0.0 (/Users/dg/.rustup/toolchains/nightly-x86_64-apple-darwin/lib/rustlib/src/rust/library/core)
   Compiling libc v0.2.140
   Compiling cc v1.0.77
   Compiling memchr v2.5.0
   Compiling std v0.0.0 (/Users/dg/.rustup/toolchains/nightly-x86_64-apple-darwin/lib/rustlib/src/rust/library/std)
   Compiling unwind v0.0.0 (/Users/dg/.rustup/toolchains/nightly-x86_64-apple-darwin/lib/rustlib/src/rust/library/unwind)
   Compiling rustc-std-workspace-core v1.99.0 (/Users/dg/.rustup/toolchains/nightly-x86_64-apple-darwin/lib/rustlib/src/rust/library/rustc-std-workspace-core)
   Compiling alloc v0.0.0 (/Users/dg/.rustup/toolchains/nightly-x86_64-apple-darwin/lib/rustlib/src/rust/library/alloc)
   Compiling cfg-if v1.0.0
   Compiling adler v1.0.2
   Compiling rustc-demangle v0.1.21
   Compiling rustc-std-workspace-alloc v1.99.0 (/Users/dg/.rustup/toolchains/nightly-x86_64-apple-darwin/lib/rustlib/src/rust/library/rustc-std-workspace-alloc)
   Compiling panic_abort v0.0.0 (/Users/dg/.rustup/toolchains/nightly-x86_64-apple-darwin/lib/rustlib/src/rust/library/panic_abort)
   Compiling panic_unwind v0.0.0 (/Users/dg/.rustup/toolchains/nightly-x86_64-apple-darwin/lib/rustlib/src/rust/library/panic_unwind)
   Compiling gimli v0.26.2
   Compiling miniz_oxide v0.5.3
   Compiling hashbrown v0.12.3
   Compiling object v0.29.0
   Compiling std_detect v0.1.5 (/Users/dg/.rustup/toolchains/nightly-x86_64-apple-darwin/lib/rustlib/src/rust/library/stdarch/crates/std_detect)
error[E0432]: unresolved import `alloc::sync`
 --> /Users/dg/.cargo/registry/src/index.crates.io-6f17d22bba15001f/gimli-0.26.2/src/read/dwarf.rs:2:12
  |
2 | use alloc::sync::Arc;
  |            ^^^^ could not find `sync` in `alloc`

For more information about this error, try `rustc --explain E0432`.
error: could not compile `gimli` (lib) due to previous error
warning: build failed, waiting for other jobs to finish...
Whoa... that's way too much. We didn't mean for all of that to happen. Let's check that cargo manual again. Ah, it says we need to pass an argument to our command line argument if we don't want as much stuff to be build
> cargo build --example ex1 --target thumbv4t-none-eabi -Z build-std=core
   Compiling gba_from_scratch v0.1.0 (/Users/dg/gba-from-scratch)
error[E0463]: can't find crate for `std`
  |
  = note: the `thumbv4t-none-eabi` target may not support the standard library
  = note: `std` is required by `gba_from_scratch` because it does not declare `#![no_std]`
  = help: consider building the standard library from source with `cargo build -Zbuild-std`

For more information about this error, try `rustc --explain E0463`.
error: could not compile `gba_from_scratch` (lib) due to previous error
That's different from before at least.
Well, we told to to only build core and not std, and then it said we couldn't use std.
Makes sense.
Lets change the example.
// ex1.rs
#![no_std]

fn main() {
  println!("hello");
}
And we need to fix our lib.rs to also be no_std.
It doesn't do anything else for now, it's just blank beyond being no_std.
#![allow(unused)]
fn main() {
// lib.rs
#![no_std]
}
Now rust-analyzer is telling me we can't use println in our example.
Also, we're missing a #[panic_handler].
Here's the error.
> cargo build --example ex1 --target thumbv4t-none-eabi -Z build-std=core
   Compiling gba_from_scratch v0.1.0 (/Users/dg/gba-from-scratch)
error: cannot find macro `println` in this scope
 --> examples/ex1.rs:4:3
  |
4 |   println!("hello");
  |   ^^^^^^^

error: `#[panic_handler]` function required, but not found

error: could not compile `gba_from_scratch` (example "ex1") due to 2 previous errors
Well, we can comment out the println!.
For the panic handler, we go to the Attributes part of the rust reference.
That links us to panic_handler, which sets what function gets called in event of panic.
// ex1.rs
#![no_std]

fn main() {
  //
}

#[panic_handler]
fn panic_handler(_: &core::panic::PanicInfo) -> ! {
  loop {}
}
Now we get a new, different error when we try to build:
> cargo build --example ex1 --target thumbv4t-none-eabi -Z build-std=core
   Compiling gba_from_scratch v0.1.0 (/Users/dg/gba-from-scratch)
error: requires `start` lang_item

error: could not compile `gba_from_scratch` (example "ex1") due to previous error
Alright so what's this start lang item deal?
Well it has to do with the operating system being able to run your executable.
The details aren't important for us, because there's no operating system on the GBA.
Instead of trying to work with the start thing, we'll declare our program as #![no_main].
This prevents the compiler from automatically generating the main entry fn, which is what's looking to call that start fn.
Note that this generated main fn is separate from the main fn that we normally think of as being the start of the program.
Because, as always, programmers are very good at naming things.
// ex1.rs
#![no_std]
#![no_main]

fn main() {
  //
}

#[panic_handler]
fn panic_handler(_: &core::panic::PanicInfo) -> ! {
  loop {}
}
Okay let's try another build.
> cargo build --example ex1 --target thumbv4t-none-eabi -Z build-std=core
   Compiling gba_from_scratch v0.1.0 (/Users/dg/gba-from-scratch)
warning: function `main` is never used
 --> examples/ex1.rs:4:4
  |
4 | fn main() {
  |    ^^^^
  |
  = note: `#[warn(dead_code)]` on by default

warning: `gba_from_scratch` (example "ex1") generated 1 warning
    Finished dev [unoptimized + debuginfo] target(s) in 0.64s
Okay. It builds.
Using mGBA
Let's see if it works I guess.
Personally I like to use mGBA as my emulator of choice, but any GBA emulator should be fine.
If you're on Windows then your executable will be called mgba.exe by default, and if you're on Mac or Linux you'll get both mgba (no UI) and mgba-qt (has a menu bar and such around the video frame).
On my Windows machine I just made a copy of mgba.exe that's called mgba-qt.exe so that both names work on all of my devices.
> mgba target/thumbv4t-none-eabi/debug/examples/ex1
The emulator starts and then... shows a dialog box. "An error occurred." says the box's title bar. "Could not load game. Are you sure it's in the correct format?" Well, sorry mgba, but we're not sure it's in the correct format. In fact, we're pretty sure it's not the correct format right now. I guess we'll have to inspect the compilation output.
ARM Binutils
If we go to ARM's developer website we can fine the ARM Toolchain Downloads page.
This lets us download the tools for working with executables for the arm-none-eabi family of targets.
This includes our thumbv4t program, as well as other variants of ARM code.
You can get it from their website, or if you're on a Linux you can probably get it from your package manager.
The binutils package for a target family has many individual tools.
The ones we'll be using will all be named arm-none-eabi- to start, to distinguish them from the same tool for other targets.
So if we want to use "objdump" we call it with arm-none-eabi-objdump and so on.
That's exactly what we want to use right now.
We pass the name of the compiled executable, and then whichever other options we want.
For now let's look at the --section-headers
> arm-none-eabi-objdump target/thumbv4t-none-eabi/debug/examples/ex1 --section-headers

target/thumbv4t-none-eabi/debug/examples/ex1:     file format elf32-littlearm

Sections:
Idx Name          Size      VMA       LMA       File off  Algn
  0 .debug_abbrev 000000f4  00000000  00000000  00000094  2**0
                  CONTENTS, READONLY, DEBUGGING, OCTETS
  1 .debug_info   000005a6  00000000  00000000  00000188  2**0
                  CONTENTS, READONLY, DEBUGGING, OCTETS
  2 .debug_aranges 00000020  00000000  00000000  0000072e  2**0
                  CONTENTS, READONLY, DEBUGGING, OCTETS
  3 .debug_str    00000495  00000000  00000000  0000074e  2**0
                  CONTENTS, READONLY, DEBUGGING, OCTETS
  4 .debug_pubnames 000000c0  00000000  00000000  00000be3  2**0
                  CONTENTS, READONLY, DEBUGGING, OCTETS
  5 .debug_pubtypes 00000364  00000000  00000000  00000ca3  2**0
                  CONTENTS, READONLY, DEBUGGING, OCTETS
  6 .ARM.attributes 00000030  00000000  00000000  00001007  2**0
                  CONTENTS, READONLY
  7 .debug_frame  00000028  00000000  00000000  00001038  2**2
                  CONTENTS, READONLY, DEBUGGING, OCTETS
  8 .debug_line   00000042  00000000  00000000  00001060  2**0
                  CONTENTS, READONLY, DEBUGGING, OCTETS
  9 .comment      00000013  00000000  00000000  000010a2  2**0
                  CONTENTS, READONLY
There's a few columns of note:
Sizeis the number of bytes for the section.VMAis the Virtual Memory Address. On the GBA this means the intended address when the main program is running. All of our data starts in ROM, and some of it we will copy into RAM just after boot. When a section is intended to be copied into RAM, it will have a VMA separate from the LMA.LMAis the Logical Memory Address. On the GBA this means the address in ROM.
Which means... according to the chart... none of this data would end up in the ROM? I guess that means that, if we extracted our raw program from the ELF container file that the compiler uses, we would end up with a totally blank ROM. That certainly doesn't sound like what mgba would call the "correct format".
Linker Scripts
What's wrong is that we need to adjust the linker script.
That link goes to the documentation for the binutils linker (called ld), and technically we're actually using the linker that ships with the compiler (called rust-lld).
rust-lld is the Rust version of lld, which is LLVM's linker that's intended to be a "drop in" replacement for GNU's ld.
Both linkers use a linker script system, and they both even use the same linker script format.
I tried to find an in depth manual for lld specifically, but all I could find was the top level "man page" explanations.
Referring to the the GNU ld manual will have to do.
You don't have to read the whole manual, the short story goes like this: linkers take one or more "object" files and "link" them into a single "executable" file. The linker script is what guides the linker in exactly what to do. If you don't say what script to use then the linker will use a default linker script that it keeps wherever. When the target is a "normal" target like Windows or Mac then using a default linker script is just fine. When the target is something a little more esoteric, like most embedded devices, including the GBA, then the default won't be good enough. We'll have to write our own script and make the linker use that.
One complexity here is that the linker script to use is an argument passed to the linker.
And the way you pass args to the linker is that you tell rustc to do it.
Except with cargo build there's no way to tell rustc an extra argument.
We could use cargo rustc, but it's a pain to have to remember an alternate command.
As much as possible we'd like cargo build to work.
We could use a build.rs file to pass an arg to the linker, but making a build script just to pass one argument seems like maybe overkill.
Probably we should just set it as part of our the RUSTFLAGS environment variable.
The catch with RUSTFLAGS is that any time you change it you have to build the entire crate graph again.
We want to "write it down" (so to speak) and have it automatically be the same every time.
This can be done with a cargo configuration file.
First let's make a blank normal_boot.ld file in a linker_scripts/ folder.
Then in the .cargo folder we fill in config.toml
# .cargo/config.toml

[target.thumbv4t-none-eabi]
rustflags = ["-Clink-arg=-Tlinker_scripts/normal_boot.ld"]
while we're at it, we can even set a default target (which is used when we don't specify --target, and we can configure for build-std to be automatically be used, all in the same file.
# .cargo/config.toml

[unstable]
build-std = ["core"]

[build]
target = "thumbv4t-none-eabi"

[target.thumbv4t-none-eabi]
rustflags = ["-Clink-arg=-Tlinker_scripts/normal_boot.ld"]
Great, let's try it out
> cargo build --example ex1
warning: function `main` is never used
 --> examples\ex1.rs:4:4
  |
4 | fn main() {
  |    ^^^^
  |
  = note: `#[warn(dead_code)]` on by default

warning: `gba_from_scratch` (example "ex1") generated 1 warning
    Finished dev [unoptimized + debuginfo] target(s) in 0.10s
Cool. It's a lot less to type, and we're ready to fill in our linker script.
Our linker script is called normal_boot.ld because there's two ways for the GBA to boot up.
One of them is the "normal" style with a program running off of the game pak.
The other is "multiboot" where the GBA can download a program over the link cable.
Since we might want to do multiboot some day, we might as well give our linker script a specific name to start with.
Once things are set up we won't really have to think about it on a regular basis, so it's fine.
There's three things we'll have to concern ourselves with:
- The entry point
- The memory locations
- The sections
Picking an entry point is easy, it's just the name of a symbol.
The traditional entry point name is just _start, so we'll go with that.
ENTRY(_start)
Having an entry point set doesn't really matter for running the program on actual GBA hardware. Still when the entry point ends up at one of the usual address values, it helps the heuristic system mgba uses to determine if it should run our program as a normal game or a multiboot game, so it's not entirely useless.
Which brings us to the memory portion.
The GBA has three main chunks of memory: Read-Only Memory (ROM), Internal Work RAM (IWRAM), and External Work RAM (EWRAM). We can cover more of the fine differences later, for now it's enough to write them down into our linker script. For each one we have to specify the base address and the size in bytes.
MEMORY {
  ewram (w!x) : ORIGIN = 0x2000000, LENGTH = 256K
  iwram (w!x) : ORIGIN = 0x3000000, LENGTH = 32K
  rom (rx)    : ORIGIN = 0x8000000, LENGTH = 32M
}
Finally, we have to tell the linker which output section to assign all of the input sections it finds. This uses a glob-matching sort of system. We specify an output section that we want to have created, and then in the braces for it we list matchers that are checked against each input section the linker sees. When an input section fits one of the matchers, it goes with that output section.
Program code is supposed to end up in the .text section, so we can start with just that.
SECTIONS {
  .text : {
    *(.text .text.*);
  } >rom
}
Here we've got one matcher listed, *(.text .text.*);.
The * at the start means it applies to any input file.
We could limit what files it applies to, if we wanted, but generally we shouldn't.
Inside the parenthesis is a space separated list of globs.
We've got two: .text and .text.*.
The first is for the exact match .text, and the second is for anything that starts with .text..
The convention for section names is to start with a ., and they can't have spaces.
Rust will default to having every function in its own section, all with the prefix .text..
Unused code can only be removed one entire input section at a time, so having every function in a distinct input section keeps our output as small as possible.
The >rom part after tha braces allocates the entire output section into the rom memory that we declared before.
All together, we've got this:
/* normal_boot.ld */
/* THIS LINKER SCRIPT FILE IS RELEASED TO THE PUBLIC DOMAIN (SPDX: CC0-1.0) */

ENTRY(_start)

MEMORY {
  ewram (w!x) : ORIGIN = 0x2000000, LENGTH = 256K
  iwram (w!x) : ORIGIN = 0x3000000, LENGTH = 32K
  rom (rx)    : ORIGIN = 0x8000000, LENGTH = 32M
}

SECTIONS {
  .text : {
    *(.text._start);
    *(.text .text.*);
  } >rom
}
This isn't a complete and "final" linker script, but for now it's enough to let us proceed.
If we rebuild the program right now we still won't get anything in the output .text section.
Remember that dead code warning we keep getting on our main function?
Nothing in our program ever calls main, and it's not public for outsiders to call, so it gets discarded during linking.
Since no code can call main then no code can panic either, and the panic_handler function gets removed as well.
We end up with nothing at all.
Writing A _start
We need to add some code to our progam so that there will be something to output.
Might as well define the _start function.
_start doesn't work like a normal function.
The way the very start of the GBA's ROM works is special.
When the GBA first boots the BIOS (which is part of the GBA itself, not part of our ROM) takes control.
It and plays the boot animation and sound that you're probably familiar with, then does a checksum on our ROM's header data.
If the checksum passes the BIOS jumps control to 0x0800_0000 (the start of ROM).
That's where our _start will be.
The first instruction can be "anything" but immediateley after that is the rest of the header data.
That means that in practice the very first instruction of _start has to be a jump past the rest of the header data, since the header data isn't executable code.
Sticking non-executable data into the middle of a function isn't something that the compiler is really capable of dealing with, so we'll have to take direct control of the situation.
We could do this using either global_assembly! or a #[naked] function.
One might think that we should pick the Stable option (global assembly), over the Nightly option (a naked function).
However, naked functions are basically much easier to work with.
Since using build-std means that we have to use Nightly anyway, it's not that bad to also use naked functions as well.
If naked functions were the very last thing that required us to use Nightly we could move to global assembly instead.
At the top of ex1.rs we need to add #![feature(naked_functions)].
Then we add our _start function.
In addition to marking it as #[naked], we also mark it #[no_mangle].
We need to use #[instruction_set(arm::a32)] as well.
This is part of that arm/thumb thing from before.
Because the BIOS jumps to the start of the ROM with the CPU in a32 mode, our function must be encoded appropriately.
Since _start has got to specifically at the very start of the ROM we'll use #[link_section = ".text._start"] to assign our function a specific section name we can use in our linker script.
Since _start is going to be "called" by the outside world we have to assign it the extern "C" ABI.
Since it should never return we will mark the return type as -> !.
So far it all looks like this:
#![allow(unused)]
fn main() {
// ex1.rs

#[naked]
#[no_mangle]
#[instruction_set(arm::a32)]
#[link_section = ".text._start"]
unsafe extern "C" fn _start() -> ! {
  todo!()
}
}
Inside of the _start function, because it's a naked function, we must put an asm! block as the only statement.
Our assembly will be very simple for now.
Let's look at it on its own.
b 1f
.space 0xE0
1:
b 1b
In the first line we branch (b) to the label 1 that is "forward" from the instruction (1f).
Then with .space we put 0xE0 blank bytes.
This is called a "directive", it doesn't emit an instruction directly, instead it tells the assembler to do a special action.
We can tell it's a directive because it has a . at the beginning.
The blank space is where the header data can go when we need to fill it in.
mgba doesn't check the header, so during development it's fine to leave the header blank.
We can always fix the header data after compilation using a special tool called gbafix when we need to.
The 1: is a label.
We know it's a label because it ends with :.
Unlike with function names, a label can be just a number.
In fact, it's preferred to only use numberic labels whenever possible.
When a non-numeric label is defined more than once it causes problems (that's why function names are mangled by default, and we had to use no_mangle).
When a numeric label is defined more than once, all instances of that label can co-exist just fine.
When you jump to a numbered label (forward or back), it just jumps to the closest instance of that number (in whichever direction).
Note that a label can have something else on the same line following the :.
Usually a label will be on a line of its own so that it stands out a little more in the code, but that's just a code style thing.
Something can follow a label on the same line as well.
If a label is on a line of its own, the label "points to" the next line that has a non-label thing on it.
You can also have more than one label point at the same line, if necessary.
Finally, our second actual instruction is that we want to branch backward to the label 1.
Since that 1 label points at the branch itself, this instruction causes an infinite loop.
The same as if we'd written loop {} in rust.
At the end of our assembly we have to put options(noreturn).
That's just part of how #[naked] functions work.
So when we put it all together we get this:
#![allow(unused)]
fn main() {
// ex1.rs

#[naked]
#[no_mangle]
#[instruction_set(arm::a32)]
#[link_section = ".text._start"]
unsafe extern "C" fn _start() -> ! {
  core::arch::asm! {
    "b 1f",
    ".space 0xE0",
    "1:",
    "b 1b",
    options(noreturn)
  }
}
}
And we also want to adjust the linker script.
Since _start is now in .text._start, we'll put a special matcher for that to make sure it stays at the start of the ROM, no matter what order the linker sees our files in.
/* normal_boot.ld */

SECTIONS {
  .text : {
    *(.text._start);
    *(.text .text.*);
  } >rom
}
And after all of this, we can build our example and see that something shows up in the .text section of the executable.
> cargo build --example ex1 && arm-none-eabi-objdump target/thumbv4t-none-eabi/debug/examples/ex1 --section-headers
   Compiling core v0.0.0 (C:\Users\Daniel\.rustup\toolchains\nightly-x86_64-pc-windows-msvc\lib\rustlib\src\rust\library\core)
   Compiling rustc-std-workspace-core v1.99.0 (C:\Users\Daniel\.rustup\toolchains\nightly-x86_64-pc-windows-msvc\lib\rustlib\src\rust\library\rustc-std-workspace-core)
   Compiling compiler_builtins v0.1.89
   Compiling gba_from_scratch v0.1.0 (D:\dev\gba-from-scratch)
    Finished dev [unoptimized + debuginfo] target(s) in 9.98s

target/thumbv4t-none-eabi/debug/examples/ex1:     file format elf32-littlearm

Sections:
Idx Name          Size      VMA       LMA       File off  Algn
  0 .text         000000e6  08000000  08000000  00010000  2**1
                  CONTENTS, ALLOC, LOAD, READONLY, CODE
  1 .ARM.exidx    00000010  080000e8  080000e8  000100e8  2**2
                  CONTENTS, ALLOC, LOAD, READONLY, DATA
  2 .debug_abbrev 0000010a  00000000  00000000  000100f8  2**0
                  CONTENTS, READONLY, DEBUGGING, OCTETS
  3 .debug_info   000005b7  00000000  00000000  00010202  2**0
                  CONTENTS, READONLY, DEBUGGING, OCTETS
  4 .debug_aranges 00000028  00000000  00000000  000107b9  2**0
                  CONTENTS, READONLY, DEBUGGING, OCTETS
  5 .debug_ranges 00000018  00000000  00000000  000107e1  2**0
                  CONTENTS, READONLY, DEBUGGING, OCTETS
  6 .debug_str    0000049c  00000000  00000000  000107f9  2**0
                  CONTENTS, READONLY, DEBUGGING, OCTETS
  7 .debug_pubnames 000000cb  00000000  00000000  00010c95  2**0
                  CONTENTS, READONLY, DEBUGGING, OCTETS
  8 .debug_pubtypes 00000364  00000000  00000000  00010d60  2**0
                  CONTENTS, READONLY, DEBUGGING, OCTETS
  9 .ARM.attributes 00000030  00000000  00000000  000110c4  2**0
                  CONTENTS, READONLY
 10 .debug_frame  00000038  00000000  00000000  000110f4  2**2
                  CONTENTS, READONLY, DEBUGGING, OCTETS
 11 .debug_line   00000056  00000000  00000000  0001112c  2**0
                  CONTENTS, READONLY, DEBUGGING, OCTETS
 12 .comment      00000013  00000000  00000000  00011182  2**0
                  CONTENTS, READONLY
I think we're ready to test the program.
Obviously we just use cargo run and...
> cargo run --example ex1
    Finished dev [unoptimized + debuginfo] target(s) in 0.08s
     Running `target\thumbv4t-none-eabi\debug\examples\ex1`
error: could not execute process `target\thumbv4t-none-eabi\debug\examples\ex1` (never executed)

Caused by:
  %1 is not a valid Win32 application. (os error 193)
Ah, right, Windows doesn't know how to run GBA programs, of course.
Instead, let's adjust the .cargo/config.toml to set a "runner" value in our target confituration.
When we have a runner set, cargo run will call the runner program and pass the program we picked as the first argument.
# .cargo/config.toml

[target.thumbv4t-none-eabi]
rustflags = ["-Clink-arg=-Tlinker_scripts/normal_boot.ld"]
runner = "mgba-qt" #remove the -qt part if you're on Windows!
And so we try again
> cargo run --example ex1
    Finished dev [unoptimized + debuginfo] target(s) in 0.08s
     Running `mgba-qt target\thumbv4t-none-eabi\debug\examples\ex1`
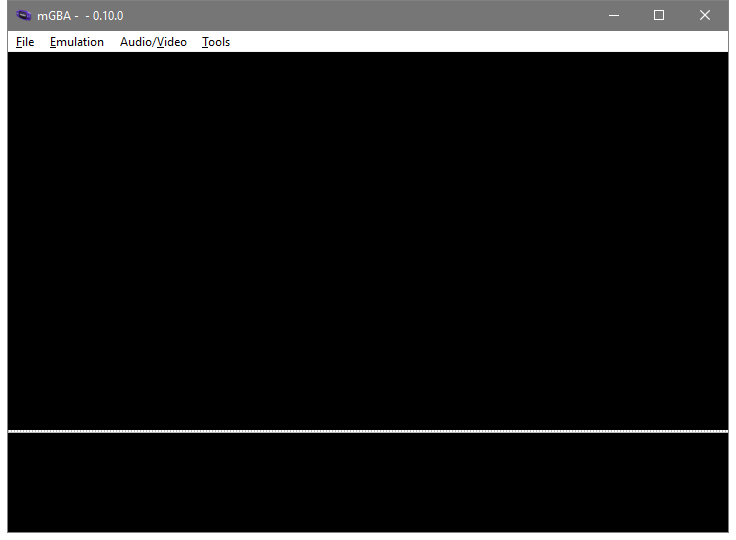
If everything is right so far, mGBA should launch and show a white screen. Congrats, it didn't crash.
Checking With objdump
If we want to double check that our code is showing up in the executable properly we can even use objdump to check that.
If we pass --disassemble we can get a printout of the assembly.
There's a bunch of other options for how to configure that output too, so check the --help output to see what you can do.
I like to use --demangle --architecture=armv4t --no-show-raw-insn -Mreg-names-std, and you get output like this:
> arm-none-eabi-objdump target/thumbv4t-none-eabi/debug/examples/ex1 --disassemble --demangle --architecture=armv4t --no-show-raw-insn -Mreg-names-std

target/thumbv4t-none-eabi/debug/examples/ex1:     file format elf32-littlearm


Disassembly of section .text:

08000000 <_start>:
 8000000:       b       80000e4 <_start+0xe4>
        ...
 80000e4:       b       80000e4 <_start+0xe4>
 80000e8:       udf     #65006  ; 0xfdee
Disassembly is a tricky thing sometimes.
It's not always clear to the disassembler what is code and what's data.
Or when it should decode a32 code (4 bytes each) or t32 code (2 bytes each).
In this case, the disassembler did notice that enough bytes in a row are all zero, and it just cuts that from the output with a ....
That's cool, but it doesn't always work.
Every once in a while the disassembler will interpret things wrong and a chunk of the display will be nonsense.
It's kinda just how it goes, try not to worry if you see it happen.
Also, at the end of our function we can see there's an undefined instruction.
Those will happen sometimes at the end functions.
I'm unclear on why.
It doesn't seem to be for alignment, because going 4 bytes past 0x0800_00E8 to 0x0800_00EC would make things less aligned.
Still, I guess it's not really a big deal when it happens.
We've got so much ROM space available that an occasional 2 or 4 bytes extra won't really break the bank.
Proving Our Program Is Doing Something
It's all nice and well to see a white screen, but let's finish up this section by having our program do something, anything at all, which lets us see that we're really having an effect on the GBA.
The simplest thing to do would be to make the screen turn on black instead of white. When the BIOS transfers control to our program a thing called the "forced blank" mode is active. This makes the display draw all pixels as white. If we turn off the forced blank bit we'll get a black screen instead.
All we have to do is add a few more lines of assembly to our _start function:
#![allow(unused)]
fn main() {
// in `main` of ex1.rs

  core::arch::asm! {
    "b 1f",
    ".space 0xE0",
    "1:",
    "mov r0, #0x04000000",
    "mov r1, #0",
    "strh r1, [r0]",
    "2:",
    "b 2b",
    options(noreturn)
  }
}
This part after the header data is what's new:
mov r0, #0x04000000
mov r1, #0
strh r1, [r0]
mov will "move" a value into a register.
This shares the usual assignment syntax of Rust and most other programming languages:
the destination register is on the left,
and the source data to move into that register is on the right.
So you could think of it being similar to
#![allow(unused)]
fn main() {
let r0 = 0x04000000;
}
The # means that the value is an "immediate" value.
It gets encoded into the instruction itself, so it doesn't have to "come from" anywhere else.
With LLVM's assembler it seems like actually putting the # before an immediate value is optional (that is: the program will compile the same without it),
but on some assemblers putting the # is required, so I'll be putting it in the tutorial code.
After we move values into r0 and r1 we have a strh.
This will "store(half)" the data in the first argument to the address in the second argument.
In other words, it writes the lower 16 bits of the register to the address, as if the address was a *mut u16.
The argument order for single loads and stores on ARM is that the address is always last, and in square brackets.
The square brackets make it fairly easy to spot when skimming through a big pile of assembly.
After doing that strh we have an "empty loop" like we had before, but just using the label 2 instead of 1 this time.
And if we turn on the program...
cargo run --example ex1
Instead of a totally white screen, we'll see a totally black screen. We've had some effect on the GBA.
Which is enough to call this article over. In the next article we'll actually learn more details about what we just did, as well as more details about how else we can affect the screen.
This is the exact state of the repo when I finished this article.
User Input
So far we can build a program that shows a white screen, or a program that shows a black screen. As fascinating as this is, we can't even make the program switch from white to black while it's running. That will be our goal for this part.
For this article we'll be mostly working on a new example: ex2.rs
Memory Mapped Input/Output (MMIO)
At the end of the last article I told you to put a mysterious bit of assembly into the program
mov r0, #0x04000000
mov r1, #0
strh r1, [r0]
This "resets the forced blank bit", and that lets the display show the normal picture instead of all white. At the moment our normal picture is all black, but soon it will be something else.
What's happening is called Memory Mapped Input/Output, or Memory Mapped IO, or even just MMIO.
The CPU only knows how to do math and access memory. What "accessing memory" actually means is that a signal goes along a "bus". The signal can be pushed out to other hardware ("store"), or be pulled in from the other hardware ("load"). When the signal's address points a memory device it's how we store data for later. There's also other types of device too, things that don't just store data. When the signal goes there, "other stuff" happens.
The address 0x04000000 connects to a part of the display system called the Display Control.
When we set the display control's bits to 0_u16 with our strh instruction, that includes the forced blank bit.
There's other bits too, which we'll get to soon.
All of the GBA's hardware is controlled via MMIO, so most of this series will involve explaining MMIO address values and the correct way to set ths bits at each address.
Note that an MMIO address is not like normal memory:
- Sometimes an address will be read-only (writes are totally ignored) or write-only (reading produces garbage data).
- Sometimes an address will allow both reads and writes, but what you read back will be something else from what you last wrote.
- This is not the case with any of the GBA's MMIO, but on some other devices (eg: the NES) reading an MMIO location can be "destructive", changing the value just by reading it.
Volatile Memory Access
Normally the compiler will try to keep memory accesses to a minimum. If it sees you read an address twice without a write in between, it'll (usually) only do the first read. If you write to an address twice without a read in between it'll (usually) skip the first write. I say "usually" because it depends on optimization level and such. It's simple stuff, but it makes programs fast, and we want our programs fast.
However, when working with MMIO every single memory access has to happen exactly as we write it in our program. If we're (for example) reading the address for the button data then of course we'd read it over and over without ever doing a write. But we still need every single read to actually happen so we can get the newest button data.
To tell the compiler this, we use a "volatile" load or store instead of a normal load or store.
This is done with the read_volatile and write_volatile pointer methods.
But those are unsafe methods because the compiler naturally doesn't know if, for any given pointer, it's safe to just read or write some data.
Pointers can come from anywhere, they might be dangling, etc etc, all the normal problems with raw pointers.
Instead, we'll use the voladdress crate.
It's got some alternatives to just raw points that ease the volatile usage quite a bit.
I made it specifically to power the gba crate's MMIO, so we can be fairly confident that it'll be useful for writing GBA programs.
> cargo add voladdress
    Updating crates.io index
      Adding voladdress v1.3.0 to dependencies.
Now in our lib.rs we can declare DISPCNT.
That's the short name that GBATEK (the main GBA homebrew manual) and mGBA use for the display control.
In Rust terms it's a VolAddress for a u16 value.
It's safe to read or write, and it's located at 0x0400_0000 like we saw before.
#![allow(unused)]
fn main() {
// in lib.rs

use voladdress::{Safe, VolAddress};

pub const DISPCNT: VolAddress<u16, Safe, Safe> =
  unsafe { VolAddress::new(0x0400_0000) };
}
Now we can adjust the display control within Rust. Neato.
Moving _start Into The Library
When we made ex1.rs we put the _start function directly into the example file.
That's not a great long term plan.
We want to have a _start function that just does the correct startup "in the background", automatically.
We don't want to be thinking about it again with each new example we make.
So first let's copy the _start function into lib.rs.
This will require us to put #![feature(naked_functions)] at the top of lib.rs.
Again, we could use global assembly instead, but I think that global assembly is just a little worse than naked functions, and we're already on Nightly.
Now all of our examples moving forward will have the _start function (assuming they link in our library).
That's fine, except that right now _start doesn't have a way to call any function in our executable.
We're gonna rewrite _start to do whatever startup it needs and then we'll have it call another function.
If we pick an un-mangled name for the function that _start calls each executable we make will be able to make a function with that name and the linker will weave it all together just fine.
Since it's the conventional "beginning of the program" name let's use main.
First we update _start:
#![allow(unused)]
fn main() {
// in lib.rs
#[naked]
#[no_mangle]
#[instruction_set(arm::a32)]
#[link_section = ".text._start"]
unsafe extern "C" fn _start() -> ! {
  core::arch::asm! {
    "b 1f",
    ".space 0xE0",
    "1:",
    "ldr r12, =main",
    "bx r12",
    options(noreturn)
  }
}
}
Our new assembly is this part:
ldr r12, =main
bx r12
The first line, ldr <reg>, =symbol, is a special "pseudo instruction".
It looks like an instruction, but what the assembler actually outputs is a slight variation.
What will happen is that the assembler will insert a load operation for an address relative to this instruction, and then at that relative address the assembler will also insert the address of main itself.
This way we don't have to know where main is.
In fact we don't even have to have defined main at all.
That's good, because our library won't define main anyway.
As long as the final executable defines main somewhere the linker will patch it all together.
The second line bx <reg> is a "branch-exchange".
This is a special kind of branch that we have to use with ARMv4T when we want to switch between ARM code (a32) and Thumb code (t32).
It switches to the correct code mode as part of the jumping the program's execution to the new address.
The _start function must be written in a32 code, but most of the rest of the program, including main, could be written in either code type.
Since main might be a different code type from _start we use bx instead of the basic b instruction we've been using previously.
(note: there's a third type of branch on the GBA called bl, which we'll see eventually).
While b instruction jumped to a label, bx jumps to a register.
That's why we have to load main into r12 before we can use bx.
I picked r12 in this case just because the convention is that it's a "scratch" register.
With the C ABI the caller will never pass data through r12, and functions are allowed to modify r12 without restoring the value before they return.
That's all that _start has to do for now.
Later it will have some setup work to do before calling main, but not yet.
This Is An Incomplete Start Function
NOTE: This _start function is "incomplete" in the sense that it doesn't initialize RAM.
This means that you can't use any static mutable data with non-zero initial values.
We're not doing that right now, so that's not a problem for us right now, and we'll get to that eventually.
But it is a non-obvious limitation worth mentioning.
Adding main To ex2.rs
Now in ex2.rs we need to have a main function that's no_mangle, extern "C", and that doesn't ever return.
To begin, we'll make the actual body of main just do what we were doing before.
First write 0 to DISPCNT, and then do a loop forever.
// ex2.rs
#![no_std]
#![no_main]

use gba_from_scratch::DISPCNT;

#[no_mangle]
pub extern "C" fn main() -> ! {
  DISPCNT.write(0);
  loop {}
}

#[panic_handler]
fn panic_handler(_: &core::panic::PanicInfo) -> ! {
  loop {}
}
And if we run this in mGBA with cargo run --example ex2 we see... actually we see a mostly black screen but with a white line on it.
That's... not what we expected?
That's not either of the types of screen that we got before.
Here's where things get kinda weird.
If we run our program in --release mode we don't see the line.
Let's look at the output of the compiler again with objdump.
In fact, now that we've got more than one example let's have a script to store that "use objdump" stuff.
I'm gonna make a dump.bat, but you can make dump.sh if you're on Mac or Linux.
It's just a few plain commands, no special scripting.
cargo build --examples

arm-none-eabi-objdump target/thumbv4t-none-eabi/debug/examples/ex1 --section-headers --disassemble --demangle --architecture=armv4t --no-show-raw-insn -Mreg-names-std >target/ex1.txt

arm-none-eabi-objdump target/thumbv4t-none-eabi/debug/examples/ex2 --section-headers --disassemble --demangle --architecture=armv4t --no-show-raw-insn -Mreg-names-std >target/ex2.txt
Okay, and the target/ex1.txt file has about what we expect in it. A bunch of sections like we saw before and then.
Disassembly of section .text:

08000000 <_start>:
 8000000:	b	80000e4 <_start+0xe4>
	...
 80000e4:	mov	r0, #67108864	; 0x4000000
 80000e8:	mov	r1, #0
 80000ec:	strh	r1, [r0]
 80000f0:	b	80000f0 <_start+0xf0>
 80000f4:	udf	#65006	; 0xfdee
Yep, just what we expected.
Let's see what's in target/ex2.txt, same basic thing, right?
Ah, wait, well there's 29 sections instead of 12.
That's probably fine, more debug info or something, probably?
Won't affect our code, I'm sure.
Disassembly of section .text:

08000000 <_start>:
 8000000:	b	80000e4 <_start+0xe4>
	...
 80000e4:	ldr	r12, [pc, #4]	; 80000f0 <_start+0xf0>
 80000e8:	bx	r12
 80000ec:	udf	#65006	; 0xfdee
 80000f0:	.word	0x08000115
Sure, what we expected...
080000f4 <voladdress::voladdress_::VolAddress<T,R,voladdress::Safe>::write>:
 80000f4:	push	{r7, lr}
 80000f6:	sub	sp, #16
 80000f8:	str	r1, [sp, #4]
 80000fa:	str	r0, [sp, #8]
 80000fc:	add	r2, sp, #12
 80000fe:	strh	r1, [r2, #0]
 8000100:	bl	8000178 <core::num::nonzero::NonZeroUsize::get>
 8000104:	ldr	r1, [sp, #4]
 8000106:	bl	800012c <core::ptr::write_volatile>
 800010a:	add	sp, #16
 800010c:	pop	{r7}
 800010e:	pop	{r0}
 8000110:	mov	lr, r0
 8000112:	bx	lr
Oops.. that's... not a good way to write to a pointer.
08000114 <main>:
 8000114:	movs	r0, #1
 8000116:	lsls	r0, r0, #26
 8000118:	movs	r1, #0
 800011a:	bl	80000f4 <voladdress::voladdress_::VolAddress<T,R,voladdress::Safe>::write>
 800011e:	b.n	8000120 <main+0xc>
 8000120:	b.n	8000120 <main+0xc>
Oh?
08000122 <rust_begin_unwind>:
 8000122:	sub	sp, #4
 8000124:	str	r0, [sp, #0]
 8000126:	b.n	8000128 <rust_begin_unwind+0x6>
 8000128:	b.n	8000128 <rust_begin_unwind+0x6>
 800012a:	bmi.n	80000d6 <_start+0xd6>
Okay that one seems okay, I think?
0800012c <core::ptr::write_volatile>:
 800012c:	push	{r7, lr}
 800012e:	sub	sp, #24
 8000130:	str	r0, [sp, #0]
 8000132:	movs	r2, r1
 8000134:	str	r2, [sp, #4]
 8000136:	str	r0, [sp, #12]
 8000138:	add	r0, sp, #16
 800013a:	strh	r1, [r0, #0]
 800013c:	movs	r0, #1
 800013e:	cmp	r0, #0
 8000140:	bne.n	8000154 <core::ptr::write_volatile+0x28>
 8000142:	b.n	8000144 <core::ptr::write_volatile+0x18>
 8000144:	ldr	r0, [sp, #4]
 8000146:	ldr	r1, [sp, #0]
 8000148:	strh	r0, [r1, #0]
 800014a:	add	sp, #24
 800014c:	pop	{r7}
 800014e:	pop	{r0}
 8000150:	mov	lr, r0
 8000152:	bx	lr
 8000154:	ldr	r0, [sp, #0]
 8000156:	str	r0, [sp, #8]
 8000158:	ldr	r0, [sp, #8]
 800015a:	str	r0, [sp, #20]
 800015c:	bl	8000180 <core::intrinsics::is_aligned_and_not_null>
 8000160:	cmp	r0, #0
 8000162:	bne.n	8000170 <core::ptr::write_volatile+0x44>
 8000164:	b.n	8000166 <core::ptr::write_volatile+0x3a>
 8000166:	ldr	r0, [pc, #12]	; (8000174 <core::ptr::write_volatile+0x48>)
 8000168:	movs	r1, #111	; 0x6f
 800016a:	bl	80002fc <core::panicking::panic_nounwind>
 800016e:	udf	#254	; 0xfe
 8000170:	b.n	8000144 <core::ptr::write_volatile+0x18>
 8000172:	nop			; (mov r8, r8)
 8000174:	.word	0x08000440
Oh... uh... oh no. And there's more. It goes on and on, but I think you get the joke at this point.
Yeah, rustc outputs utter garbage code without optimizations enabled.
Just, atrocious.
The only reason it's usable at all on your desktop is because modern computers are so fast.
Our best bet is to just turn on full optimizations for the debug profile.
This can be done in Cargo.toml.
In a new profile.dev section we set the opt-level to 3.
[profile.dev]
opt-level = 3
And rebuild / redump the program:
Disassembly of section .text:

08000000 <_start>:
 8000000:	b	80000e4 <_start+0xe4>
	...
 80000e4:	ldr	r12, [pc, #4]	; 80000f0 <_start+0xf0>
 80000e8:	bx	r12
 80000ec:	udf	#65006	; 0xfdee
 80000f0:	.word	0x080000f5

080000f4 <main>:
 80000f4:	movs	r0, #1
 80000f6:	lsls	r0, r0, #26
 80000f8:	movs	r1, #0
 80000fa:	strh	r1, [r0, #0]
 80000fc:	b.n	80000fc <main+0x8>
That's it, that's our whole program once optimizations have been applied. Now we don't get the white line.
Why did we get it before?
I don't know exactly.
Our ex2 program "stops" on an infinite loop that's just as fast as the ex1 version, even if it takes longer to get there.
I'd have thought that it wouldn't make a difference, but somehow it does.
Emulators are weird like that sometimes.
Oh, and speaking of weird stuff, while we're adjusting build configuration things, I found out about that undefined instruction thing.
Our good friend Scott wrote in (so to speak) and suggested trying -Ztrap-unreachable=no in RUSTFLAGS.
So we just add it in the .cargo/config.toml:
[target.thumbv4t-none-eabi]
rustflags = ["-Ztrap-unreachable=no", "-Clink-arg=-Tlinker_scripts/normal_boot.ld"]
runner = "mgba-qt"
and rebuild / redump again...
Disassembly of section .text:

08000000 <_start>:
 8000000:	b	80000e4 <_start+0xe4>
	...
 80000e4:	ldr	r12, [pc]	; 80000ec <_start+0xec>
 80000e8:	bx	r12
 80000ec:	.word	0x080000f1

080000f0 <main>:
 80000f0:	movs	r0, #1
 80000f2:	lsls	r0, r0, #26
 80000f4:	movs	r1, #0
 80000f6:	strh	r1, [r0, #0]
 80000f8:	b.n	80000f8 <main+0x8>
The undefined instruction is gone! Magical! I guess the explanation is that LLVM is trying to add in a "guard" against code accidentally flowing past the end of the function. When the CPU is made to execute and undefined instruction it causes a special kind of "interrupt" to happen. We'll mostly talk about interrupts later, but for now let's just say that what LLVM is expecting is that the Operating System will handle the interrupt by killing the program (the undefined instruction "traps" your program). We don't really have an OS on the GBA, we are the OS you might say. Regardless of what you call it, that undefined instruction won't "trap" like LLVM thinks it will. The undefined interrupt handler in the BIOS just returns and the device just keeps executing. So that undefined instruction is purely a waste of space to us.
We might as well leave -Ztrap-unreachable=no set in our configuration.
The -Z part means that it's a Nightly flag, but we're on Nightly for other stuff already so it's fine.
If we have to be on Nightly for build-std, we might as well take advantage of the other extra flags we can.
More Assembly Details
Let's quickly take another close look at our two functions so far.
First is _start
08000000 <_start>:
 8000000:	b	80000e4 <_start+0xe4>
	...
 80000e4:	ldr	r12, [pc]	; 80000ec <_start+0xec>
 80000e8:	bx	r12
 80000ec:	.word	0x080000f1
So the ldr r12, =main has become ldr r12, [pc].
The pc register is the "program counter".
That's storing the next address for the CPU to read and start doing an instruction.
The ARM7TDMI has a 3 stage CPU pipeline: Fetch, Decode, Execute.
The pc register will always be pointing two instructions ahead of what instruction is actually executing.
So by the time we're executing the ldr, the pc register is two instructions ahead on .word 0x080000f1.
The .word directive inserts a literal 4 byte value, in this case 0x080000f1.
That's the address of main, +1.
The +1 part makes the address odd, which is how bx will know what code state to switch to.
So after we load an address into r12, we use bx to branch-exchange to that address.
The "exchange" part is because there's a register called the "current program status register".
This register holds several bit flags about the program's current status.
Importantly it has a T flag, which says if the CPU is running in thumb state or not.
A branch-exchange will "exchange" the lowest bit in the register holding the target address with the current value of the T flag.
- If the target address is odd then the T flag becomes set (the program will run as thumb code).
- If the target address is even then the T flag becomes cleared (the program will run as arm code).
And I know it's an "exchange", but the previous T value basically goes nowhere. They just call it an exchange to give it a fancy name, I guess.
I hope that wasn't too much. If not, don't worry. It's not essential to understand the full details right away if you want to just keep going.
Let's look over at main.
080000f0 <main>:
 80000f0:	movs	r0, #1
 80000f2:	lsls	r0, r0, #26
 80000f4:	movs	r1, #0
 80000f6:	strh	r1, [r0, #0]
 80000f8:	b.n	80000f8 <main+0x8>
Ah, here's something interesting.
Instead of mov we're doing movs, and instead of lsl (logical shift left) we're doing lsls.
When an instruction ends with s then it "sets the status flags".
_startis ARM code, and most all ARM instructions can choose to set the flags or not. We haven't set the status flags in our small amount of code so far.mainis thumb code, and most all thumb instructions are forced to set the flags. This constraints how much you can reorder your instructions. Each operation that sets flags you care about has to come just before whatever the thing using those flags is.
But let's notice something else.
We can see the addresses of each instruction, and in _start we can see each instruction is 4 bytes.
With main we can see that each instruction is just 2 bytes.
This is the advantage of using thumb code.
The program is significantly smaller.
In fact, the CPU has to access ROM over a 16-bit bus. This means that if the CPU needs a 32-bit value (such as an ARM instruction) then it needs to do two reads in a row to get the complete data. This means that when running programs out of ROM they actually run slower if they're ARM code. The CPU will have to wait over and over as it tries to get each complete instruction just half an instruction at a time. This is why we're having the default encoding for our program be thumb code.
Also, the way to get 0x0400_0000 into a register has changed:
- With ARM code we can
movthe value directly as one instruction. - With thumb code we have to
movsa 1 and then as a separate step we left shift it by 26 bits to get the right value.
What's happening is that the ARM mov instruction doesn't encode the full litearal 0x0400_0000 within the instruction.
It's only a 32 bit instruction, so it can't store a 32 bit value and also the bits to declare mov.
Instead, it stores mov and a compressed form of the data: 1<<26.
But thumb code is only 16 bits, so it can't even store that much.
Since each thumb instruction is only 2 bytes instead of 4, there's less bits to fit immediate values and do instruction variations and such.
This means that in a lot of cases an operation that's one ARM instruction will be more than one thumb instruction.
Because of this, thumb code vs ARM code is not as simple as "your program is half as big".
You get a significant savings on average, but the exact ratio depends on the program
We can see the disassembler is showing our strh as strh r1, [r0, #0].
This is saying "r0 plus 0".
Actually any store or load can be "plus some immediate value", but when the modifier is plus 0 we don't need to write it.
In this case, the disassembler is just being a little silly in how it prints things.
Also, when we see b.n 80000f8, this b.n means "branch instruction with narrow encoding".
The explanation here is that in later versions of ARM there was a "thumb 2" introduced.
In thumb 2, some instructions will be encoded as one opcode (each of which is two bytes), but then other uses will be two opcodes.
The .n is the "narrow" encoding, meaning it's the one opcode version.
On the GBA we don't use thumb2 at all, but since the objdump program is designed to work with all versions of ARM it just prints this way.
The Backdrop Color
The "backdrop" color is the color that's shown in a pixel if no background layer or object is visible in that pixel. Right now when we turn off forced blank we see a black screen because the backdrop color is black. If we were to change the backdrop color we'd see the whole screen filled with some other color.
First let's declare an MMIO for the backdrop color.
#![allow(unused)]
fn main() {
// in lib.rs
pub const BACKDROP: VolAddress<u16, Safe, Safe> =
  unsafe { VolAddress::new(0x0500_0000) };
}
Now let's update ex2.rs so that we set the backdrop color before we turn off forced blank.
// in ex2.rs
use gba_from_scratch::{BACKDROP, DISPCNT};

#[no_mangle]
pub extern "C" fn main() -> ! {
  BACKDROP.write(0b11111);
  DISPCNT.write(0);
  loop {}
}
Let's look at that assembly:
080000f0 <main>:
 80000f0:	movs	r0, #5
 80000f2:	lsls	r0, r0, #24
 80000f4:	movs	r1, #31
 80000f6:	strh	r1, [r0, #0]
 80000f8:	movs	r0, #1
 80000fa:	lsls	r0, r0, #26
 80000fc:	movs	r1, #0
 80000fe:	strh	r1, [r0, #0]
 8000100:	b.n	8000100 <main+0x10>
So first it gets the BACKDROP address in a register (5<<24), then the color value (31), then writes that, and the rest of the program is like we've seen before.
Makes sense.
We could also change the backdrop color after turning off forced blank if we wanted to. However, by default it's best practice to only adjust the display when forced blank is on or when you know it's the vertical blank period. Otherwise you can get accidental display artifacts on the screen.
If we run the program now we'll see a red screen.
The magic looking 0b11111 value is because the GBA has 5-bit per channel color.
A GBA color value is a u16 with the channels going from low to high:
0bX_BBBBB_GGGGG_RRRRR
So 0b11111 is "full red, no green or blue".
Using a raw u16 isn't that great.
We'd probably like to have a little bit more meaning to the type so that it's clearer what's going on.
We can put names on our functions and magic values, things like that.
If we replace the u16 in BACKDROP with a repr(transparent) wrapper type over an actual u16 then things will be a lot better.
This is called using a "newtype", and we'll be doing it a lot.
#![allow(unused)]
fn main() {
// in lib.rs
pub const BACKDROP: VolAddress<Color, Safe, Safe> =
  unsafe { VolAddress::new(0x0500_0000) };

#[derive(Clone, Copy, PartialEq, Eq)]
#[repr(transparent)]
pub struct Color(pub u16);
impl Color {
  pub const RED: Self = Self::rgb(31, 0, 0);

  #[inline]
  #[must_use]
  pub const fn rgb(r: u16, g: u16, b: u16) -> Self {
    Self(r | (g << 5) | (b << 10))
  }
}
}
Then we change ex2.rs to use our new Color type.
use gba_from_scratch::{Color, BACKDROP, DISPCNT};

#[no_mangle]
pub extern "C" fn main() -> ! {
  BACKDROP.write(Color::RED);
  DISPCNT.write(0);
  loop {}
}
Practically self-documenting code at this point!
If we run the program again we can see a red screen too. Let's double check our assembly to make sure we didn't kill performance somehow.
080000f0 <main>:
 80000f0:	movs	r0, #5
 80000f2:	lsls	r0, r0, #24
 80000f4:	movs	r1, #31
 80000f6:	strh	r1, [r0, #0]
 80000f8:	movs	r0, #1
 80000fa:	lsls	r0, r0, #26
 80000fc:	movs	r1, #0
 80000fe:	strh	r1, [r0, #0]
 8000100:	b.n	8000100 <main+0x10>
Hey it's the exact same as before. We've got a zero-runtime-cost abstraction, the promise of Rust is real!
Reading The Buttons
Fun as it is to have a single static color, that's still not very exciting.
We can read the current state of the keys from the KEYINPUT control.
This includes both the "buttons" as well as the direction-pad value.
#![allow(unused)]
fn main() {
// in lib.rs
pub const KEYINPUT: VolAddress<u16, Safe, ()> =
  unsafe { VolAddress::new(0x400_0130) };
}
Note that instead of Safe as the write type we've put () instead.
The key data is naturally read-only.
The CPU can't just tell the GBA to make a button be pressed or not, that's not gonna move the buttons.
With this new MMIO we can read the keys and then show a color based on the value:
// in ex2.rs
#[no_mangle]
pub extern "C" fn main() -> ! {
  DISPCNT.write(0);
  loop {
    let k = KEYINPUT.read();
    BACKDROP.write(Color(k));
  }
}
Now if we run the program and press different keys we'll see the color change.
Each bits of KEYINPUT that's connected to a key will be 0 when the key is pressed and 1 when the key is released.
It's known as a "low-active" control scheme, because when a key is pressed it goes from high (1) to low (0).
Bits not connected to any key will always just be 0.
Which key controls which bit is as follows:
| Bit | Key |
|---|---|
| 0 | A |
| 1 | B |
| 2 | Select |
| 3 | Start |
| 4 | Right |
| 5 | Left |
| 6 | Up |
| 7 | Down |
| 8 | R |
| 9 | L |
Like with the color data, we probably want to make a newtype for all this.
#![allow(unused)]
fn main() {
// in lib.rs
pub const KEYINPUT: VolAddress<KeyInput, Safe, ()> =
  unsafe { VolAddress::new(0x400_0130) };

#[derive(Clone, Copy, PartialEq, Eq)]
#[repr(transparent)]
pub struct KeyInput(pub u16);
#[rustfmt::skip]
impl KeyInput {
  #[inline]
  pub const fn a(self) -> bool { (self.0 & (1<<0)) == 0 }
  #[inline]
  pub const fn b(self) -> bool { (self.0 & (1<<1)) == 0 }
  #[inline]
  pub const fn select(self) -> bool { (self.0 & (1<<2)) == 0 }
  #[inline]
  pub const fn start(self) -> bool { (self.0 & (1<<3)) == 0 }
  #[inline]
  pub const fn right(self) -> bool { (self.0 & (1<<4)) == 0 }
  #[inline]
  pub const fn left(self) -> bool { (self.0 & (1<<5)) == 0 }
  #[inline]
  pub const fn up(self) -> bool { (self.0 & (1<<6)) == 0 }
  #[inline]
  pub const fn down(self) -> bool { (self.0 & (1<<7)) == 0 }
  #[inline]
  pub const fn r(self) -> bool { (self.0 & (1<<8)) == 0 }
  #[inline]
  pub const fn l(self) -> bool { (self.0 & (1<<9)) == 0 }
}
}
(This is kinda begging for a macro_rules!, but it's basically fine to put that off until later.)
Also let's add a definition for GREEN on our color type.
#![allow(unused)]
fn main() {
impl Color {
  pub const RED: Self = Self::rgb(31, 0, 0);
  pub const GREEN: Self = Self::rgb(0, 31, 0);
  // ...
}
}
Now we can read the keys, and set the color to red or green based on if a key is pressed or not:
#[no_mangle]
pub extern "C" fn main() -> ! {
  DISPCNT.write(0);
  loop {
    let k = KEYINPUT.read();
    BACKDROP.write(if k.a() { Color::RED } else { Color::GREEN })
  }
}
And I think that's enough for one article.
This is the exact commit of the project files when I finished writing this article.
Objects / Sprites
Now that we can get user input there's a lot of things that we could learn about next. Probably we should focus on how to improve our drawing abilities.
Most of the GBA's drawing abilities involve either the 4 background layers, or the 128 objects (called "OBJ" for short). The background layers let you draw a few "big" things (128x128 or bigger), and the objects let you draw many "small" things (64x64 or less).
The objects have a fairly consistent behavior, while the four background layers behave differently depending on the "video mode" that you set in the display control. That's reason enough to focus on the objects first.
Are They Objects Or Are They Sprites?
The objects are sometimes called "sprites". GBATEK calls them objects, and mGBA (v0.10 at least) calls them sprites. Some people care about the difference between the two terms, but I don't. I'm just going to say "object" most of the time in this series because the data for them is called the "object active memory".
Display Control
We've already seen that the display control has a "forced blank" bit. Most of the other bits are for background control stuff, but since some of them affect object display we'll just cover that right now.
| Bit(s) | Setting |
|---|---|
| 0-2 | Video Mode |
| 3 | (Unused in GBA mode) |
| 4 | Frame Select |
| 5 | Unlocked H-blank |
| 6 | Linear object tile mapping |
| 7 | Forced Blank |
| 8 | Enable Background 0 |
| 9 | Enable Background 1 |
| 10 | Enable Background 2 |
| 11 | Enable Background 3 |
| 12 | Enable Objects |
| 13 | Window 0 Display Flag |
| 14 | Window 1 Display Flag |
| 15 | OBJ Window Display Flag |
- Video Mode: This sets which mode the four background layers will operate with. Despite this being a 3-bit field, only modes 0 through 5 give a useful display. Modes 6 and 7 cause garbage output.
- Frame Select: Affects which bitmap frame is used in video mode 4 or 5.
- Unlocked H-blank: GBATEK calls this "H-Blank Interval Free", and mGBA's debug controls call this "Unlocked H-blank". This bit affects what you can do during the "horizontal blank" time between each scanline being shown, but when it's on fewer objects can be drawn. We won't be doing any per-scanline drawing for now, so we'll leave it off by default.
- Linear object tile mapping: This affects how we lay out the tiles for multi-tile objects. We'll talk about the details of this in just a moment.
- Forced Blank: Hey we know about this bit. When it's on, the display won't access any memory and will just output white pixels any time it would have rendered a pixel normally.
- Enable Background: These four bits set if we want each of the four background layers on. For now we don't care.
- Enable Objects: This bit sets the objects to be displayed.
- Window Flags: These three bits affect the "window" special graphical feature. We'll ignore these bits for now.
I'm going to use the bitfrob crate to get some bit manipulation utilities.
> cargo add bitfrob
    Updating crates.io index
      Adding bitfrob v1.3.0 to dependencies.
             Features:
             - track_caller
    Updating crates.io index
Now we can give a type to our display control value, as well as just enough methods to get started.
Unlike with our Color type, with the DisplayControl we want to completely prevent an invalid video mode from being set, so we'll keep the u16 that we're wrapping as a private field.
Then we just have one "builder" method for each bit or group of bits that we want to be able to change.
To start we can skip all the background related bits, so we'll only need three builders.
#![allow(unused)]
fn main() {
// in lib.rs

use bitfrob::u16_with_bit;

pub const DISPCNT: VolAddress<DisplayControl, Safe, Safe> =
  unsafe { VolAddress::new(0x0400_0000) };

#[derive(Clone, Copy, PartialEq, Eq)]
#[repr(transparent)]
pub struct DisplayControl(u16);
impl DisplayControl {
  #[inline]
  pub const fn new() -> Self {
    Self(0)
  }
  #[inline]
  pub const fn with_linear_obj_tiles(self, linear: bool) -> Self {
    Self(u16_with_bit(6, self.0, linear))
  }
  #[inline]
  pub const fn with_forced_blank(self, blank: bool) -> Self {
    Self(u16_with_bit(7, self.0, blank))
  }
  #[inline]
  pub const fn with_objects(self, objects: bool) -> Self {
    Self(u16_with_bit(12, self.0, objects))
  }
}
}
This will require updates to both ex2.rs and ex3.rs.
- For example 2, instead of writing
0we'd writeDisplayControl::new()instead. - For example 3, we want to enable object display, since we're about to start showing some objects.
// in ex3.rs

const JUST_SHOW_OBJECTS: DisplayControl =
  DisplayControl::new().with_objects(true);

#[no_mangle]
pub extern "C" fn main() -> ! {
  DISPCNT.write(JUST_SHOW_OBJECTS);

  loop {
    let k = KEYINPUT.read();
    BACKDROP.write(if k.a() { Color::RED } else { Color::GREEN })
  }
}
For now that's all we need to do for the display control.
Object Palette
Objects always need to use "paletted" color. Instead of each pixel within the object's image holding a full color value, it just holds an index into the palette. This allows each pixel to only need 4 or 8 bits each, instead of the 16 bits needed for a complete color.
The palette for objects starts at 0x0500_0200, and it's 256 entries long.
Each object can use 8 bits per pixel (8bpp) or 4 bits per pixel (4bpp).
- When an object is set for 8bpp each non-zero pixel value is the 8-bit index into the object palette. A pixel value of 0 means that the object is transparent in that pixel. This allows for up to 255 colors to be used within a single object.
- When an object is set for 4bpp each non-zero pixel value is the low half of the full index value. A second setting within the object's attributes determine the upper half of the index value. This effectively splits the palette memory into 16 "palbank" groupings. As with 8bpp objects, a pixel value of 0 makes a transparent pixel. This allows for up to 15 colors within a single object.
You might notice that index 0 of the object palette isn't ever used by either mode. The memory itself exists for consistency, but the GBA will never use the color value in that position. Call it a free global variable for your own personal use, if you want.
Since we have a series of color values instead of just a single color value,
this time we'll declare the object palette as a VolBlock instead of a VolAddress.
#![allow(unused)]
fn main() {
// in lib.rs

pub const OBJ_PALETTE: VolBlock<Color, Safe, Safe, 256> =
  unsafe { VolBlock::new(0x0500_0200) };
}
A VolBlock works mostly like an array does.
We call OBJ_PALETTE.index(i) to get a particular VolAddress, and then we can read or write that address.
We could also use get if we want to do an optional lookup, or we could iterate the block, etc.
First let's make some more named color constants. We'll name each of the 8 colors you get when each of the three color channels is either no-intensity or full-intensity.
#![allow(unused)]
fn main() {
// in lib.rs

impl Color {
  pub const BLACK: Self = Self::rgb(0, 0, 0);
  pub const BLUE: Self = Self::rgb(0, 0, 31);
  pub const GREEN: Self = Self::rgb(0, 31, 0);
  pub const CYAN: Self = Self::rgb(0, 31, 31);
  pub const RED: Self = Self::rgb(31, 0, 0);
  pub const MAGENTA: Self = Self::rgb(31, 0, 31);
  pub const YELLOW: Self = Self::rgb(31, 31, 0);
  pub const WHITE: Self = Self::rgb(31, 31, 31);
  // ...
}
}
Now we can set up a backdrop color and two different palette entries.
// in ex3.rs

#[no_mangle]
pub extern "C" fn main() -> ! {
  BACKDROP.write(Color::MAGENTA);
  OBJ_PALETTE.index(1).write(Color::RED);
  OBJ_PALETTE.index(2).write(Color::WHITE);

  DISPCNT.write(JUST_SHOW_OBJECTS);

  loop {}
}
If we run the example in mGBA we can check our work using the debug utilities. In the menu, "Tools -> Game State Views -> View Palette..." will open a dialog showing all the background and object palette info.
- The backdrop color will show up in the 0th entry of the background palette.
- The two object palette colors will be in positions 1 and 2 of the top row.
Each row of the palette is shown 16 colors at a time, so it's easy to tell what's happening in both 8bpp and 4bpp modes.
That should be enough palette setup to continue with the tutorial.
Object Tile Memory
First, what is a tile exactly:
- A tile is an 8x8 square of palette indexes.
- A palette index can be either 4 bits per pixel (4bpp) or 8 bits per pixel (8bpp). This is the "bit depth" of the indexes.
- The indexes store one row at a time, left to right, top to bottom.
So we might have the following Rust constants
#![allow(unused)]
fn main() {
// in lib.rs

pub const PIXELS_PER_TILE: usize = 8 * 8;
pub const BITS_PER_BYTE: usize = 8;
pub const SIZE_OF_TILE4: usize = (PIXELS_PER_TILE * 4) / BITS_PER_BYTE;
pub const SIZE_OF_TILE8: usize = (PIXELS_PER_TILE * 8) / BITS_PER_BYTE;
}
Also, there's 32K of object tile RAM.
#![allow(unused)]
fn main() {
// in lib.rs

macro_rules! kilobytes {
  ($bytes:expr) => {
    $bytes * 1024
  };
}

pub const SIZE_OF_OBJ_TILE_MEM: usize = kilobytes!(32);
}
Now we know how big everything is, in bytes.
However, the GBA's video memory does NOT work right with individual byte writes.
We can cover the details another time, but with video memory you always have to write in 16-bit or 32-bit chunks.
Also, the GBA is simply much faster at transferring bulk data around when it's aligned to 4.
Data aligned to 4 can be copied one or more u32 values at time (one or more "words" in ARM terms).
Being more aligned than 4 doesn't help any extra, but we want to have at least alignment 4 with anything big.
Tiles, particularly if we've got dozens or hundreds of them, count as "big enough to care about alignment".
This means that instead of modeling tile data as being arrays of u8, we'll use smaller arrays of u32, which will keep the data aligned to 4.
#![allow(unused)]
fn main() {
// in lib.rs

pub const SIZE_OF_U32: usize = core::mem::size_of::<u32>();
pub const TILE4_WORD_COUNT: usize = SIZE_OF_TILE4 / SIZE_OF_U32;
pub const TILE8_WORD_COUNT: usize = SIZE_OF_TILE8 / SIZE_OF_U32;
pub const OBJ_TILE_MEM_WORD_COUNT: usize = SIZE_OF_OBJ_TILE_MEM / SIZE_OF_U32;
}
Which lets us declare the block of u32 values where our object tile data goes.
#![allow(unused)]
fn main() {
// in lib.rs

pub const OBJ_TILES_U32: VolBlock<u32, Safe, Safe, OBJ_TILE_MEM_WORD_COUNT> =
  unsafe { VolBlock::new(0x0601_0000) };
}
Here's where things get kinda weird. An object's attributes (most of which we'll cover lower down) include a "Tile ID" for the base tile of the object. These tile id values are used as a 32 byte index, regardless of if the object uses 4bpp or 8bpp drawing. This means that they line up perfectly with a 4bpp view of the tile data, and we get 1024 IDs.
#![allow(unused)]
fn main() {
// in lib.rs

pub type Tile4 = [u32; TILE4_WORD_COUNT];
pub const OBJ_TILE4: VolBlock<Tile4, Safe, Safe, 1024> =
  unsafe { VolBlock::new(0x0601_0000) };
}
But with 8bpp objects we end up in a pickle.
We could use a VolSeries, which is an alternative to the VolBlock type, for when the stride and the element size aren't the same.
The VolSeries type is mostly intended for when the stride is bigger than the element size, but the math will work out either way.
Note that since 8bpp tiles are twice as big we have to cut down the number of tiles from 1024 to 1023 so that using the last index doesn't go out of bounds.
#![allow(unused)]
fn main() {
// in lib.rs

pub type Tile8 = [u32; TILE8_WORD_COUNT];
pub const OBJ_TILE8: VolSeries<Tile8, Safe, Safe, 1023, 32> =
  unsafe { VolSeries::new(0x0601_0000) };
}
And, well, it looks kinda weird every time I look at the code but... that's how the hardware works. It's the ultimate arbiter of what's correct, so sometimes you gotta just go with it.
We can always think about this more later, and maybe improve it then. For now it's enough that we've got the right addresses at all.
One final note: In video modes 3, 4, and 5 the lower half of the object tile region instead gets used as part of the background. In this case, only object tile index values 512 and above are usable for object display.
Object Attribute Memory
Separate from the object tile memory, there's also the Object Attribute Memory (OAM) region. This has space for 128 "attribute" entries, which defines how the objects are shown.
Each attribute needs 48 bits.
This is an unfortunate number of bits, because it's not a clean power of 2.
Normally we refer to each attribute entry as having three u16 attributes just called 0, 1, and 2.
#![allow(unused)]
fn main() {
#[derive(Clone, Copy, PartialEq, Eq, Default)]
#[repr(transparent)]
pub struct ObjAttr0(pub u16);

#[derive(Clone, Copy, PartialEq, Eq, Default)]
#[repr(transparent)]
pub struct ObjAttr1(pub u16);

#[derive(Clone, Copy, PartialEq, Eq, Default)]
#[repr(transparent)]
pub struct ObjAttr2(pub u16);
}
In between each attribute entry is part of an affine entry.
That's right, just a part of an affine entry.
A full affine entry is four i16 values (called A, B, C, and D).
There's one i16 affine value per three u16 attribute values.
The memory looks kinda like this.
- obj0.attr0
- obj0.attr1
- obj0.attr2
- affine0.a
- obj1.attr0
- obj1.attr1
- obj1.attr2
- affine0.b
- obj2.attr0
- obj2.attr1
- obj2.attr2
- affine0.c
- obj3.attr0
- obj3.attr1
- obj3.attr2
- affine0.d
And then that pattern repeats 32 times. It's a little strange, but the hardware does what it does.
We can use use several VolSeries declarations to model this.
#![allow(unused)]
fn main() {
// in lib.rs

pub const OBJ_ATTRS_0: VolSeries<ObjAttr0, Safe, Safe, 128, 64> =
  unsafe { VolSeries::new(0x0700_0000) };
pub const OBJ_ATTRS_1: VolSeries<ObjAttr1, Safe, Safe, 128, 64> =
  unsafe { VolSeries::new(0x0700_0000 + 2) };
pub const OBJ_ATTRS_2: VolSeries<ObjAttr2, Safe, Safe, 128, 64> =
  unsafe { VolSeries::new(0x0700_0000 + 4) };
}
Alternately, we could group the attributes into a single struct and view things that way.
#![allow(unused)]
fn main() {
// in lib.rs

#[derive(Clone, Copy, PartialEq, Eq, Default)]
#[repr(C)]
pub struct ObjAttr(pub ObjAttr0, pub ObjAttr1, pub ObjAttr2);

pub const OBJ_ATTRS: VolSeries<ObjAttr, Safe, Safe, 128, 64> =
  unsafe { VolSeries::new(0x0700_0000) };
}
Using the ObjAttr type and OBJ_ATTRS series would make it so that all three object attribute fields get accessed.
If you're only intending to update the position of an object (in attributes 0 and 1) without touching attribute 2, then maybe you'd care.
It's pretty unlikely to matter, but maybe.
Let's go over the actual properties within each object attribute field.
Object Attribute 0
- Bits 0 through 7 are the Y coordinate of the top-left corner of the object.
The screen is 160 pixels tall, and the coordinates wrap.
If you want something to appear to move up past the top of the screen, then wrap the Y value around.
Alternately, you can do the position math using signed values and then
ascast the value to unsigned. - Bits 8 and 9 set what mGBA calls the "transform" of the object:
- 0 is no transform.
- 1 is affine rendering. Which affine entry is used is set in attribute 1.
- 2 is no transform and the object not drawn (it's "disabled").
- 3 is just like 1 but the object is rendered with double size.
- Bits 10 and 11 set the special effect mode:
- 0 is no special effect.
- 1 is alpha blending.
- 2 is window masking. The object isn't shown, but acts as part of the object window mask.
- 3 is not allowed.
- Bit 12 sets if the object uses the Mosaic special effect. This can be enabled/disabled seprately from the other effects above.
- Bit 13 sets if the object uses 8bpp (bit set), or 4bpp (bit cleared).
- Bits 14 and 15 set the "shape" of the object. The exact dimensions also depend on the "size" set in attribute 1
- 0 is square
- 1 is wider
- 2 is taller
- 3 is not allowed.
| (WxH) | Size 0 | Size 1 | Size 2 | Size 3 |
|---|---|---|---|---|
| Shape 0 | 8x8 | 16x16 | 32x32 | 64x64 |
| Shape 1 | 16x8 | 32x8 | 32x16 | 64x32 |
| Shape 2 | 8x16 | 8x32 | 16x32 | 32x64 |
Object Attribute 1
- Bits 0 through 8 are the X coordinate of the top-left corner of the object. This works basically the same as with the Y coordinate, but the screen is 260 pixels wide so 9 bits are used.
- Bits 8 through 13 depend on if the object is using affine rendering or not.
- When affine (or double sized affine) rendering is used, they set the index of the affine entry used.
- Otherwise Bit 12 sets horizontal flip and Bit 13 set vertical flip.
- Bits 14 and 15 set the size of the sprite.
Object Attribute 2
- Bits 0 through 9 set the base tile index of the object. As mentioned above, in video modes 3, 4, and 5 this needs to be 512 or more.
- Bits 10 and 11 are the "priority" value. Lower priority objects and layers are sorted closer to the viewer, and so they are what's seen if they overlap something farther away. Within a given priority layer, objects always draw over backgrounds, and lower index objects/backgrounds draw over higher index ones.
- Bits 12 through 15 set the palette bank the object uses if it's using 4bpp.
Object Rendering Time
There's a limit to how many objects can be drawn per scanline, but it's not a specific number of objects. Instead, the OAM engine has a buffer that's as wide as the screen, and there's a time limit per scanline on filling the buffer.
- When the "Unlocked H-blank" bit is clear in
DISPCNTyou get 1210 cycles (304 * 4 - 6) - When the "Unlocked H-blank" bit is set in
DISPCNTyou get 954 cycles (240 * 4 - 6)
The number of cycles each object consumes depends on the object's horizontal size:
- Normal objects consume
widthcycles. - Affine objects consume
2 * width + 10cycles.
Objects are processed by their index order. Objects not on the current scanline, horizontally/vertically off-screen, or that are "disabled" as their attribute 0 transform, are skipped in rendering but still take two cycles to process. Even when an object won't be drawn on the current scanline the OAM engine has to look at the attributes to know that. If not all objects are handled and time runs out then any unprocessed objects simply won't be drawn on this scanline.
Showing Static Objects
Armed with all this knowledge we can probably show a static object.
First we want to set at least one tile in the object tile memory to some sort of pattern.
If we write a hex u32 literal, then each digit of the hex value will be 4 bits, so we can make a 4bpp tile pretty easy.
One catch is that the indexes fill the tile from left to right, but we write numbers in code with the low-place-value digits on the right.
So our "tile" as a u32 literal will be left-right flipped from how it'll appear on the GBA:
#![allow(unused)]
fn main() {
/// A tile with an extra notch on the upper left.
#[rustfmt::skip]
const TILE_UP_LEFT: [u32; 8] = [
  // Each hex digit is one 4bpp index value.
  // Also, the image is left-right flipped from how it
  // looks in code because the GBA is little-endian!
  0x11111111,
  0x12222111,
  0x12222111,
  0x12222221,
  0x12222221,
  0x12222221,
  0x12222221,
  0x11111111,
];
}
And we can copy the data into object tile 1 in our main function.
#[no_mangle]
pub extern "C" fn main() -> ! {
  BACKDROP.write(Color::MAGENTA);
  OBJ_PALETTE.index(1).write(Color::RED);
  OBJ_PALETTE.index(2).write(Color::WHITE);

  OBJ_TILE4.index(1).write(TILE_UP_LEFT);

  DISPCNT.write(JUST_SHOW_OBJECTS);

  loop {}
}
We can make other similar tiles too, one for each corner notch.
#![allow(unused)]
fn main() {
  OBJ_TILE4.index(1).write(TILE_UP_LEFT);
  OBJ_TILE4.index(2).write(TILE_UP_RIGHT);
  OBJ_TILE4.index(3).write(TILE_DOWN_LEFT);
  OBJ_TILE4.index(4).write(TILE_DOWN_RIGHT);
}
If we show an 8x8 object using object tile 1, then we'll see an upper-left square.
#![allow(unused)]
fn main() {
  OBJ_ATTRS.index(0).write(ObjAttr(ObjAttr0(0), ObjAttr1(0), ObjAttr2(1)));
}
And if we make it wider we can see an upper left and upper right square too.
#![allow(unused)]
fn main() {
  OBJ_ATTRS.index(0).write(ObjAttr(
    ObjAttr0(1 << 14),
    ObjAttr1(0),
    ObjAttr2(1),
  ));
}
But when we make it taller instead, we see... just one tile? Why isn't there a second tile drawn below the first?
This is that "Linear object tile mapping" flag from way back with the Display Control. It defaults to off, so by default when we want to have an object more than 8 pixels tall, the next row of the object will use +32 indexes from the previous row.
#![allow(unused)]
fn main() {
  // using `x + 32*y` to get the index
  OBJ_TILE4.index(1 + 32*0).write(TILE_UP_LEFT);
  OBJ_TILE4.index(2 + 32*0).write(TILE_UP_RIGHT);
  OBJ_TILE4.index(1 + 32*1).write(TILE_DOWN_LEFT);
  OBJ_TILE4.index(2 + 32*1).write(TILE_DOWN_RIGHT);
}
Alternately, we can set up our display control to use the linear object tile system and then just fill tiles 1 to 4 like they're a normal array.
const JUST_OBJECTS_LINEAR: DisplayControl =
  DisplayControl::new().with_objects(true).with_linear_obj_tiles(true);

#[no_mangle]
pub extern "C" fn main() -> ! {
  BACKDROP.write(Color::MAGENTA);
  OBJ_PALETTE.index(1).write(Color::RED);
  OBJ_PALETTE.index(2).write(Color::WHITE);

  OBJ_TILE4.index(1).write(TILE_UP_LEFT);
  OBJ_TILE4.index(2).write(TILE_UP_RIGHT);
  OBJ_TILE4.index(3).write(TILE_DOWN_LEFT);
  OBJ_TILE4.index(4).write(TILE_DOWN_RIGHT);

  OBJ_ATTRS.index(0).write(ObjAttr(
    ObjAttr0(0),       // square shape
    ObjAttr1(1 << 14), // size 1
    ObjAttr2(1),       // base tile 1
  ));

  DISPCNT.write(JUST_OBJECTS_LINEAR);

  loop {}
}
It's really up to you. As long as you're consistent, either way will work.
Of course, also you'd want to have a lot of methods for easily getting/setting the right bits of each attribute value.
I'll put those in to lib.rs right now, but I'm not gonna show them all here in the tutorial text.
They all do just what you'd expect based on the DisplayControl type.
For the ObjAttr type we can have methods that dispatch to the correct inner field's method.
On the x and y properties we can make them take i16 instaed of u16 and then just cast inside the setter.
The user will probably want to support signed positions so that stuff can go up off the screen and left off the screen.
#![allow(unused)]
fn main() {
impl ObjAttr {
  #[inline]
  pub const fn new() -> Self {
    Self(ObjAttr0::new(), ObjAttr1::new(), ObjAttr2::new())
  }
  #[inline]
  pub const fn with_size(self, size: u16) -> Self {
    Self(self.0, self.1.with_size(size), self.2)
  }
  #[inline]
  pub const fn with_tile(self, tile: u16) -> Self {
    Self(self.0, self.1, self.2.with_tile(tile))
  }
  #[inline]
  pub const fn with_x(self, x: i16) -> Self {
    Self(self.0, self.1.with_x(x), self.2)
  }
  #[inline]
  pub const fn with_y(self, y: i16) -> Self {
    Self(self.0.with_y(y), self.1, self.2)
  }
}
}
And our final main goes like this:
#[no_mangle]
pub extern "C" fn main() -> ! {
  BACKDROP.write(Color::MAGENTA);
  OBJ_PALETTE.index(1).write(Color::RED);
  OBJ_PALETTE.index(2).write(Color::WHITE);

  OBJ_TILE4.index(1).write(TILE_UP_LEFT);
  OBJ_TILE4.index(2).write(TILE_UP_RIGHT);
  OBJ_TILE4.index(3).write(TILE_DOWN_LEFT);
  OBJ_TILE4.index(4).write(TILE_DOWN_RIGHT);

  let obj = ObjAttr::new().with_size(1).with_tile(1).with_x(10).with_y(23);
  OBJ_ATTRS.index(0).write(obj);

  DISPCNT.write(JUST_OBJECTS_LINEAR);

  loop {}
}
which displays a little square deal thing
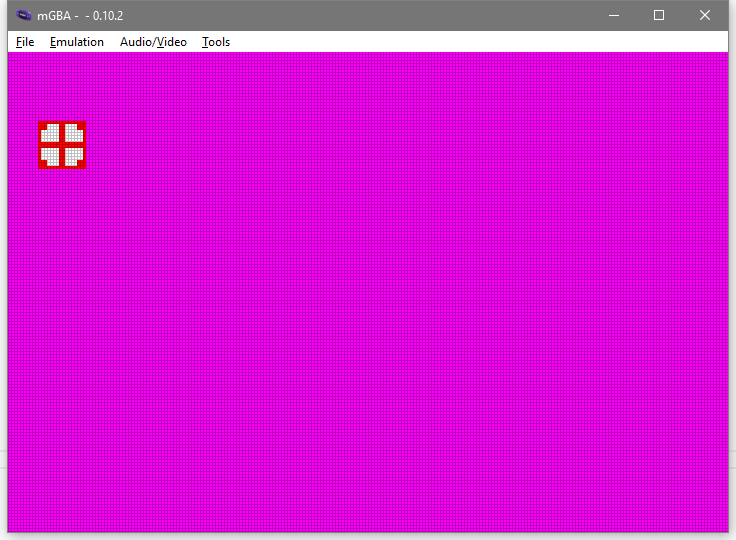
That's it for now. Next time we'll see about making our square move around and stuff.